Building Kubernetes Cluster on Raspberry Pi
I was thinking of hosting a personal blog on premise, so i build this blog from scratch using Go + Postgres + MiniO.
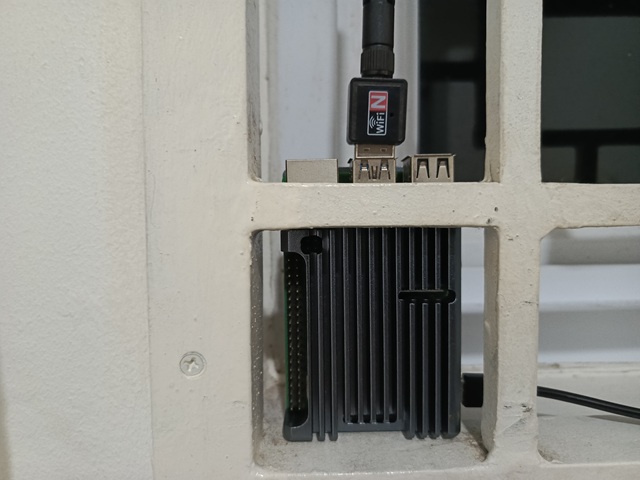
I bought a used Raspberry Pi with a 32GB SD card, some Wi-Fi adapters, a power cable and a heat sink. I think it cost almost $50.
But, this tutorial will be focused on deploying simple app on pi.
Raspberry Pi
Install Raspberry pi OS
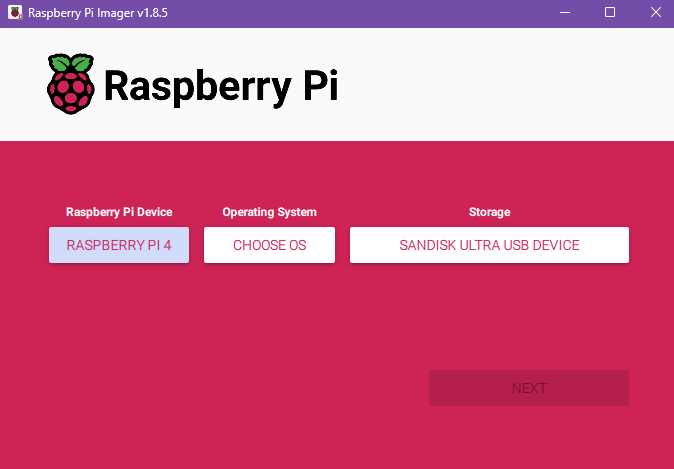
First, you need to download Raspberry Pi Imager. to your computer, then you need micro SD adapter or USB to install Raspberry Pi OS on your computer.
Choose your Raspberry Pi type, operating system and memory. As for the operating system, I personally prefer to download manually and choose the lite version unless you need the GUI.
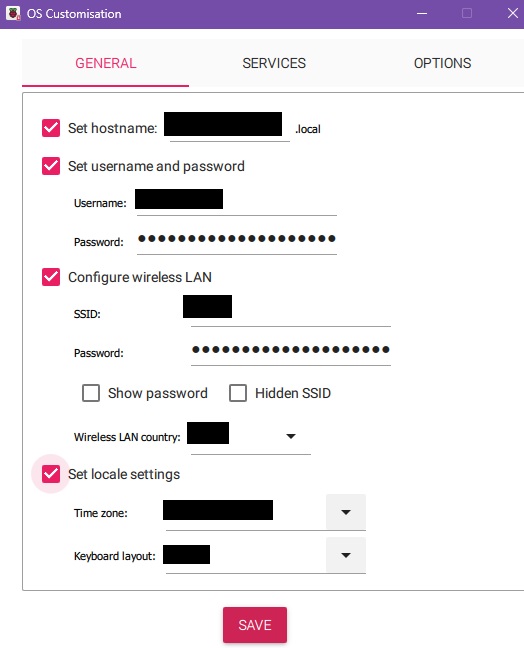
You can also customize your OS, set your hostname, username, and even wireless LAN so you don’t have to manually set it up on your Raspberry Pi.
This will create a bootable USB to install the Raspberry Pi OS. Then eject the USB and insert it into your Raspberry Pi. Wait for the installation to finish.
Setup Static IP
Check your list network
nmcli connection show
NAME                UUID                                  TYPE      DEVICE
preconfigured       as2312e1-a463-4cd4-bad2-f4023fbd4feb  wifi      wlan0
cni0                123dascz-842f-474d-b67d-c92f1d5dfd1d  bridge    cni0
flannel.1           zxc123ed-79bd-4834-a01f-12213dasdas2  vxlan     flannel.1
lo                  12d2123d-123s-1234-1233-123112312312  loopback  lo
In this example, i am using wifi, so the name is “preconfigured”.
We also need to check ip gateway
ip route | grep default
default via 192.168.1.1 dev wlan0 proto static metric 600
ip gateway is 192.168.1.1
Then we can set the static ip
sudo nmcli c mod "preconfigured" connection.id wlan
sudo nmcli c mod wlan connection.interface-name wlan
sudo nmcli c mod wlan ipv4.method manual
sudo nmcli c mod wlan ipv4.addresses 192.168.1.15/24
sudo nmcli c mod wlan ipv4.gateway 192.168.1.1
sudo nmcli c mod wlan connection.autoconnect yes
Iptables
If you are running iptables v1.6.1 and older in nftables mode you might encounter issues. We recommend utilizing newer iptables (such as 1.6.1+) to avoid issues or running iptables legacy mode.
sudo update-alternatives --set iptables /usr/sbin/iptables-legacy
sudo update-alternatives --set ip6tables /usr/sbin/ip6tables-legacy
Enable cgroups
Standard Raspberry Pi OS installations do not start with cgroups enabled. K3S needs cgroups to start the systemd service. cgroupscan be enabled by appending cgroup_memory=1 cgroup_enable=memory to /boot/firmware/cmdline.txt.
Note: On Debian 11 and older Pi OS releases the cmdline.txt is located at /boot/cmdline.txt.
console=serial0,115200 console=tty1 root=PARTUUID=58b06195-02 rootfstype=ext4 elevator=deadline fsck.repair=yes rootwait cgroup_memory=1 cgroup_enable=memory
Wi-Fi User
If you’re using Wi-Fi on your Raspberry Pi, you need to enable promiscuous mode for wifi network.
Create new file at /etc/systemd/system/bridge-promisc.service
[Unit]
Description=Makes interfaces run in promiscuous mode at boot
After=network-online.target

[Service]
Type=oneshot
ExecStart=/usr/sbin/ip link set wlan0 promisc on
TimeoutStartSec=0
RemainAfterExit=yes

[Install]
WantedBy=default.target
After that enable and start the service
sudo systemctl daemon-reload
sudo systemctl enable bridge-promisc.service
sudo systemctl start bridge-promisc.service
Install k3s
Install Master
Install k3s using this command.
curl -sfL https://get.k3s.io | sh -s - --disable traefik --disable servicelb --kube-proxy-arg=ipvs-strict-arp=true --write-kubeconfig-mode 644 --node-name your-node-name
Install Worker
Grab token from the master
cat /var/lib/rancher/k3s/server/node-token
Install k3s on the worker node
curl -sfL https://get.k3s.io | K3S_NODE_NAME=your-workername K3S_URL=https://<yourmasterip>:6443 K3S_TOKEN=<yourtoken> sh -
Deploy app using ingress-nginx-controller
Deploy simple app
We will using ingress-nginx-controller to expose our app. I am using httpd as an example for app. Deploy this app using this command.
cat <<EOF > httpd.yaml
apiVersion: apps/v1
kind: Deployment
metadata:
  labels:
    app: simpleweb
  name: simpleweb
spec:
  replicas: 1
  selector:
    matchLabels:
      app: simpleweb
  strategy: {}
  template:
    metadata:
      creationTimestamp: null
      labels:
        app: simpleweb
    spec:
      containers:
      - image: httpd
        name: httpd
        ports:
          - containerPort: 80
---
apiVersion: v1
kind: Service
metadata:
  labels:
    app: simpleweb
  name: simpleweb
spec:
  ports:
  - port: 80
    protocol: TCP
    targetPort: 80
  selector:
    app: simpleweb
EOF
kubectl apply -f httpd.yaml
NAME                             READY   STATUS    RESTARTS   AGE
pod/simpleweb-6dbcdc666d-gsdxq   1/1     Running   0          2m31s

NAME                 TYPE        CLUSTER-IP      EXTERNAL-IP   PORT(S)    AGE
service/kubernetes   ClusterIP   10.43.0.1       <none>        443/TCP    57d
service/simpleweb    ClusterIP   10.43.174.251   <none>        8080/TCP   8s
Install ingress-nginx-controller
Install ingress-nginx-controller using this command.
kubectl apply -f https://raw.githubusercontent.com/kubernetes/ingress-nginx/controller-v1.12.1/deploy/static/provider/baremetal/deploy.yaml
Wait until ingress-nginx-controller is ready
kubectl get pod,svc -n=ingress-nginx
NAME                                            READY   STATUS      RESTARTS   AGE
pod/ingress-nginx-admission-create-q9mtr        0/1     Completed   0          64s
pod/ingress-nginx-admission-patch-lbcqc         0/1     Completed   0          64s
pod/ingress-nginx-controller-778955cd79-5xx7b   1/1     Running     0          64s

NAME                                         TYPE        CLUSTER-IP     EXTERNAL-IP   PORT(S)                      AGE
service/ingress-nginx-controller             NodePort    10.43.134.55   <none>        80:30190/TCP,443:31467/TCP   64s
service/ingress-nginx-controller-admission   ClusterIP   10.43.33.220   <none>        443/TCP                      64s
pod/ingress-nginx-controller-778955cd79-5xx7b will act as an nginx
svc/ingress-nginx-controller is the way to access our app.
Configure ingress
cat <<EOF > ingress.yaml
apiVersion: networking.k8s.io/v1
kind: Ingress
metadata:
  name: ingress
  annotations:
    nginx.ingress.kubernetes.io/ssl-redirect: "false"
    nginx.ingress.kubernetes.io/use-regex: "true"
spec:
  ingressClassName: nginx
  rules:
  - http:
      paths:
      - path: /
        pathType: Prefix
        backend:
          service:
            name: simpleweb
            port:
              number: 80
EOF
kubectl get ingress
Wait until address is available.
NAME      CLASS   HOSTS   ADDRESS           PORTS   AGE
ingress   nginx   *       192.168.137.248   80      14m
*Note: httpd only works using port 80. I think you need to edit the config file to change port.
Because of we’re using nodeport, we can access the app from our local.
curl http://192.168.137.248:30190