Building Kubernetes Cluster On Dell Wyse 5070
I bought a used Dell Wyse 5070. I read online that the Dell Wyse 5070 is uses about 2.7 to 6 watts of power when it’s not being used, but it uses more when the CPU is busy.
Previously from my article, I’m using a used Raspberry Pi 4 with 2GB of RAM. I think 2GB of RAM is pretty limited, and I’d love to add more. I’m thinking of adding some applications like monitoring, storage, CICD, or something like that. I decided to get this little beast.
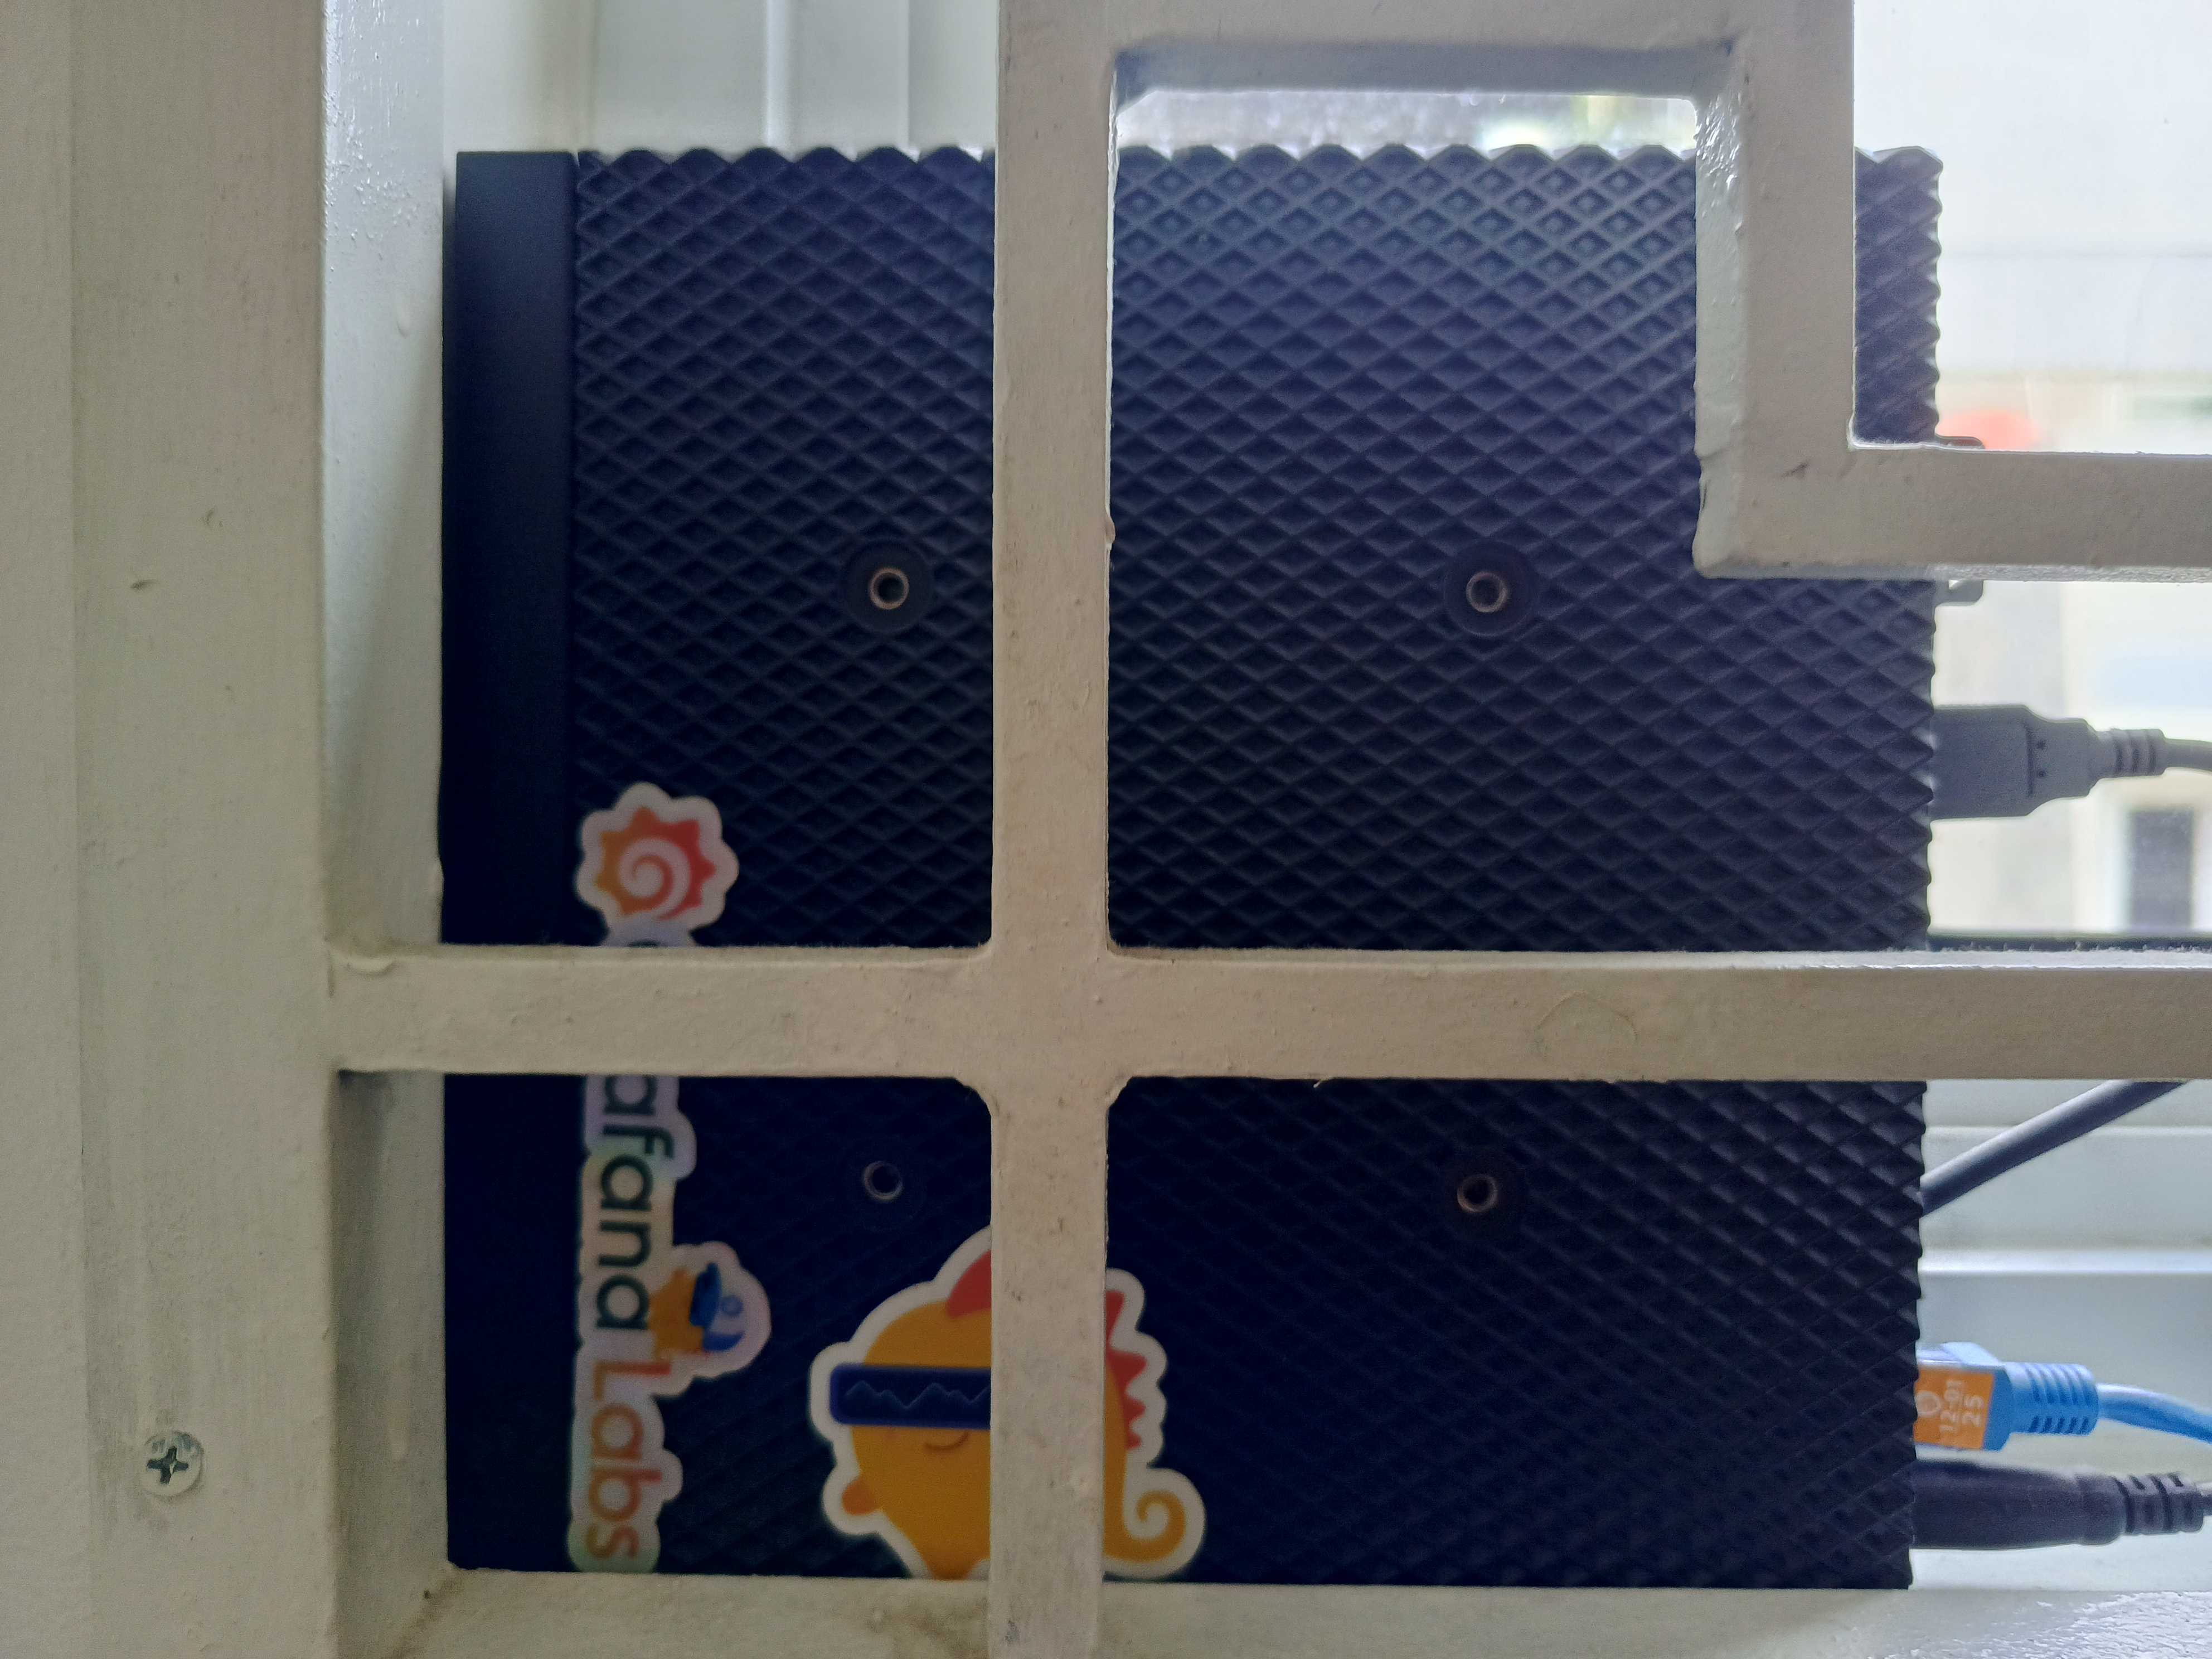
Dell Wyse 5070 with 32GB RAM (30GB)
The manufacturer stated that the Dell Wyse 5700 model has a maximum memory capacity of 16 GB. However, based on multiple sources, it appears that this model can be extended to support up to 32 GB.
test@test:~# free -h
              total         used        free       shared    buff/cache   available
Mem:            29Gi        11Gi        10Gi        72Mi       8.1Gi        17Gi
Swap:          976Mi          0B       976Mi
It looks like the RAM size is showing as 30 GB instead of 32 GB.
BTW, There are 2 brands of RAM that i tried and it works.
SK Hynix HMA82GS6AFR8N-UH 16gb 2400hz
Micron MTA16ATF2G64HZ-2G6E1 16gb 2666hz
Architecture
The next step is to set up a Proxmox server to create some Kubernetes clusters. Here’s the architecture.
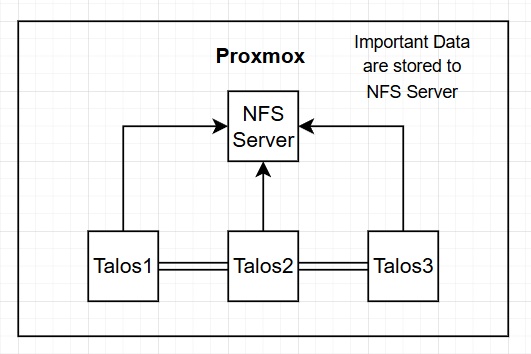
There are four clusters. The first one is Debian for the NFS Server and the next three are Talos Linux.
Network File System (NFS)
NFS (Network File System) server is a system that shares directories and files with other computers over a network, allowing users and programs to access remote files as if they were local.
The database and CDN server are connected to the NFS server thanks to nfs-subdir-external-provisioner.
I also tried to use Longhorn, but it used a lot of CPU. So, i chose the easiest method. Might uses Longhorn in the future.
Talos Linux
Talos Linux is a modern, open-source Linux distribution specifically designed for Kubernetes, emphasizing security, immutability, and minimalism.
They are basically operating systems for Kubernetes. Talos Linux can only communicate through an API, which makes it secure.
Application
I deployed my own blog on this cluster, written in Go, which is lightweight, and easy to deploy.
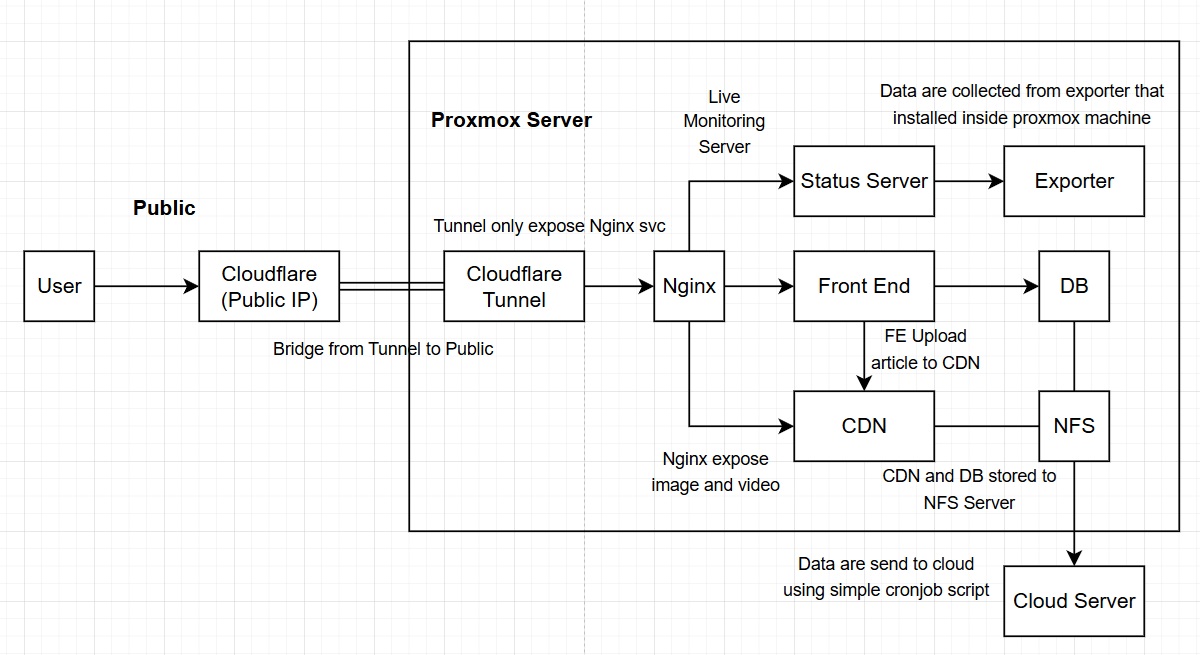
I’m using Cloudflare Tunnel to expose my website. So, here’s what the config would look like.
    tunnel: proxmox
    credentials-file: /path/to/your/credentials.json
    metrics: 0.0.0.0:2000
    no-autoupdate: true
    ingress:
    - hostname: "*.stefandy.blog"
      service: http://proxy.nginx.svc.cluster.local
    - service: http_status:404
The Cloudflare tunnel will make the NGINX service available to the public. After that, your website can be accessed by the public.
One of the key advantages of Cloudflare is that it eliminates the need to reveal your public IP address or open ports, as Cloudflare handles these aspects automatically. Also, Cloudflare’s got analytics and a Web Application Firewall (WAF).
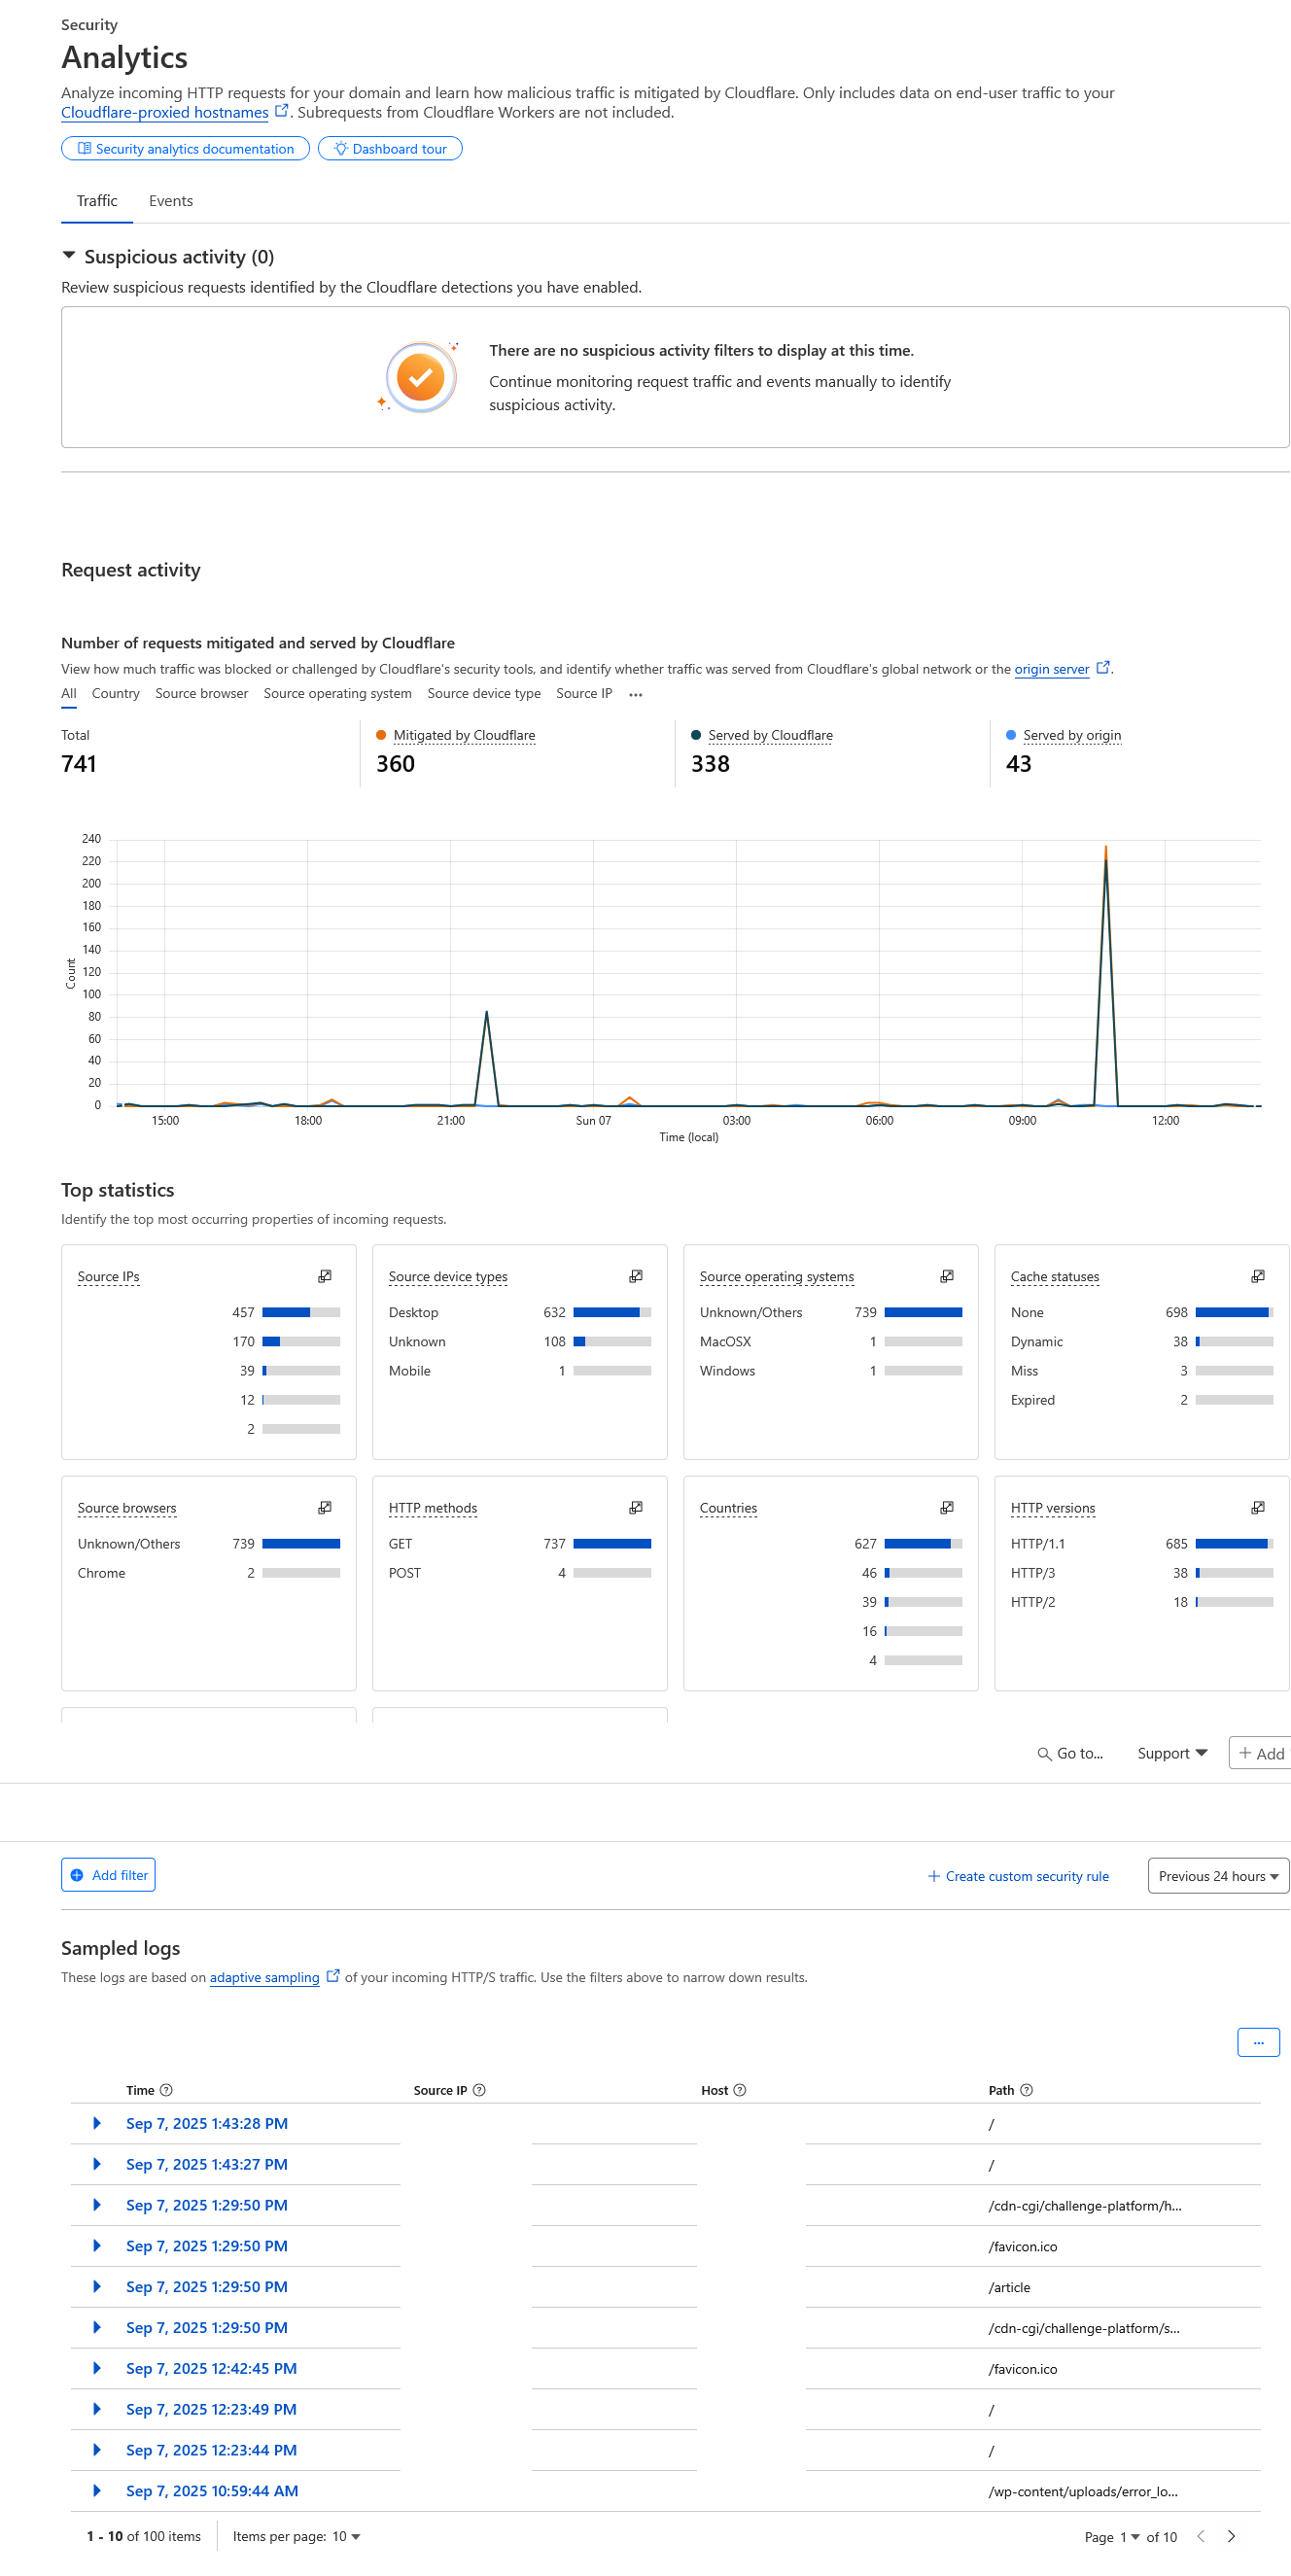
Cloudflare Analytics
I think the Cloudflare analytics dashboard is pretty good. You can monitor IP user, their device, countries and many more. DDOS attacks are pretty common, so it’s important to set up WAF to keep your cluster secure.
Web Application Firewall (WAF)
The free version can only have up to five rules. If you’re just hosting a simple website, five rules should be enough.

My firewall rules are mostly to make sure that people who access this website are using the correct endpoint. This ensures that the requests are already rejected without reaching my server.
Monitoring
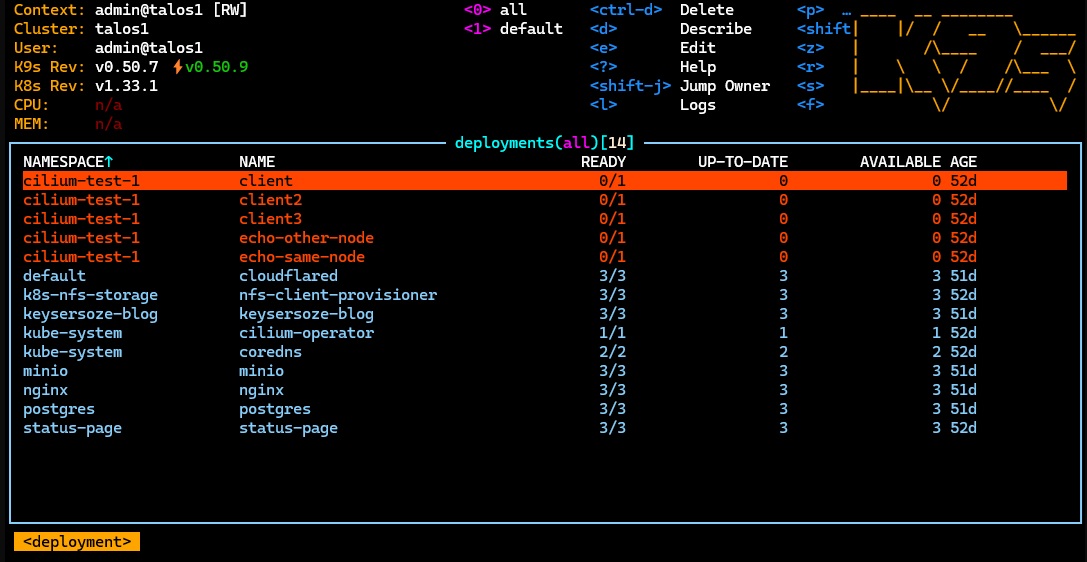
K9s is an open-source, terminal-based user interface designed to simplify the management of Kubernetes clusters.
I usually use this tool to take a quick peek from my local. Simple and just works.